Exporting Mixly Standalone Projects
And Testing JavaScript/HTML Locally
January 26, 2025
Introduction
This article explains how to export and test a Mixly project locally on your machine. We'll cover the following topics:
- Exporting dialog
- Running on a local server
- Anatomy of an exported Mixly project
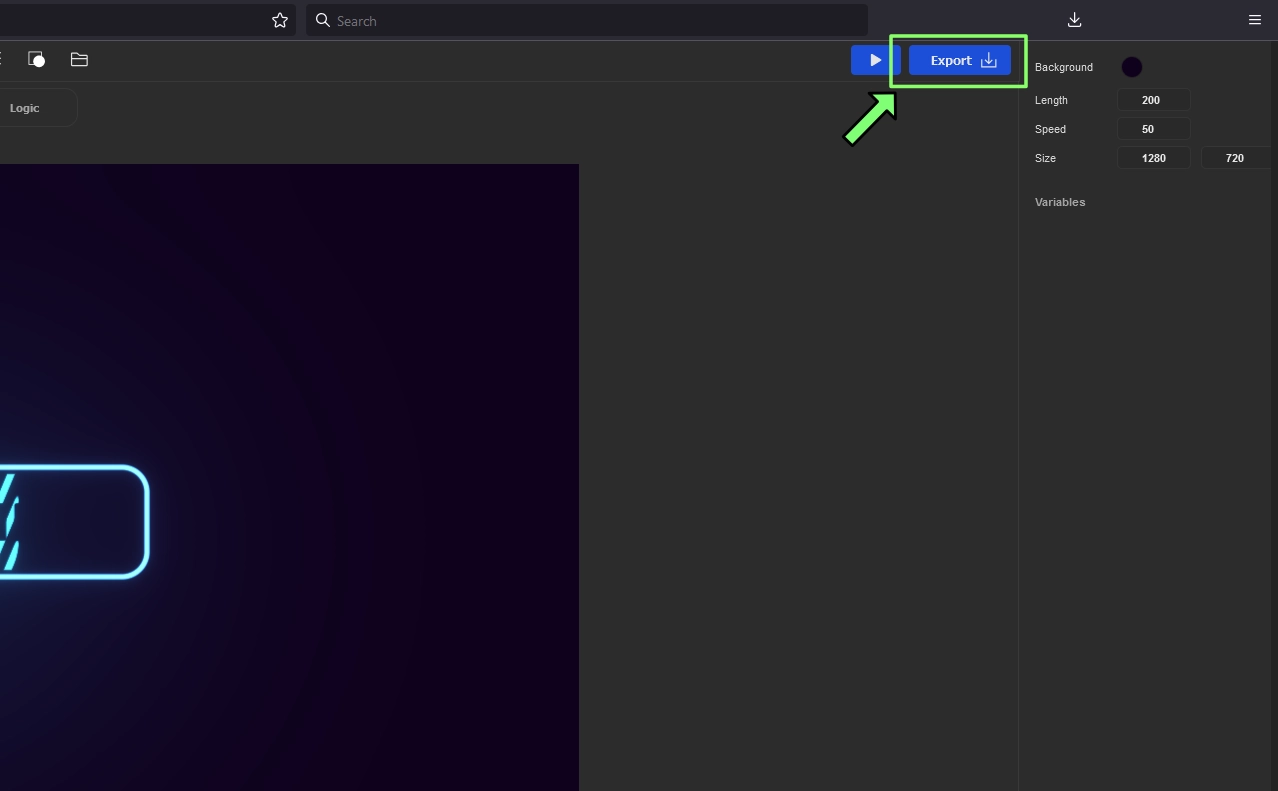
Exporting Dialog
When your project is ready for testing, open the export dialog from the top-right corner of the main project view.

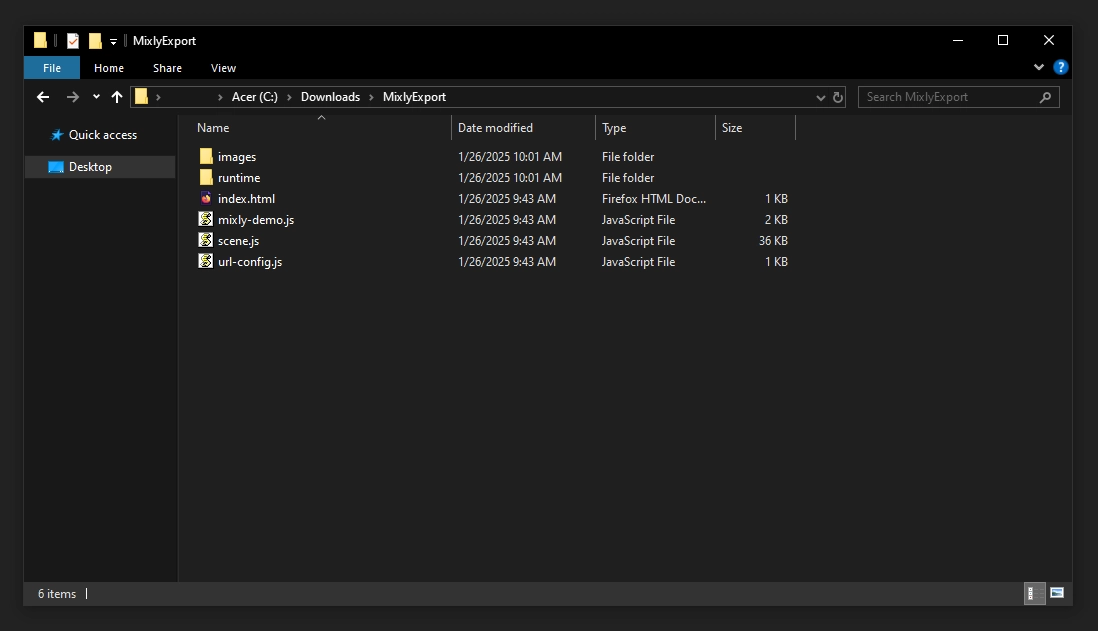
Once downloaded, extract the .zip file to your desired location.
Running on a Local Server
The exported project includes a basic test setup. The main file is index.html. However, opening the file directly in your browser might not work due to security restrictions (CORS). To fix this, you'll need to run a local web server.
Mozilla provides a guide for setting up a local server using various methods: Mozilla's tutorial
For this article, we'll use Python to run the server. Download Python here: Python Download
After downloading, open your terminal and navigate to the folder where you extracted the project:
cd c:/Downloads/MixlyProject/
python -m http.server
If Python is installed as python3 on your system, use this command:
python3 -m http.server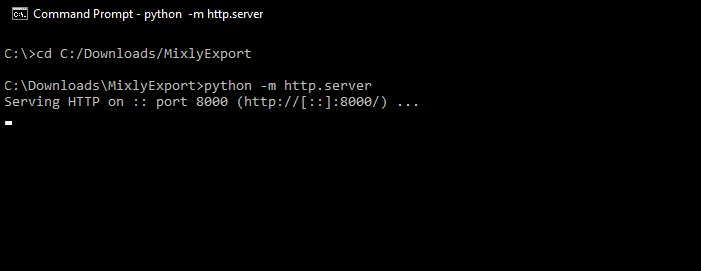
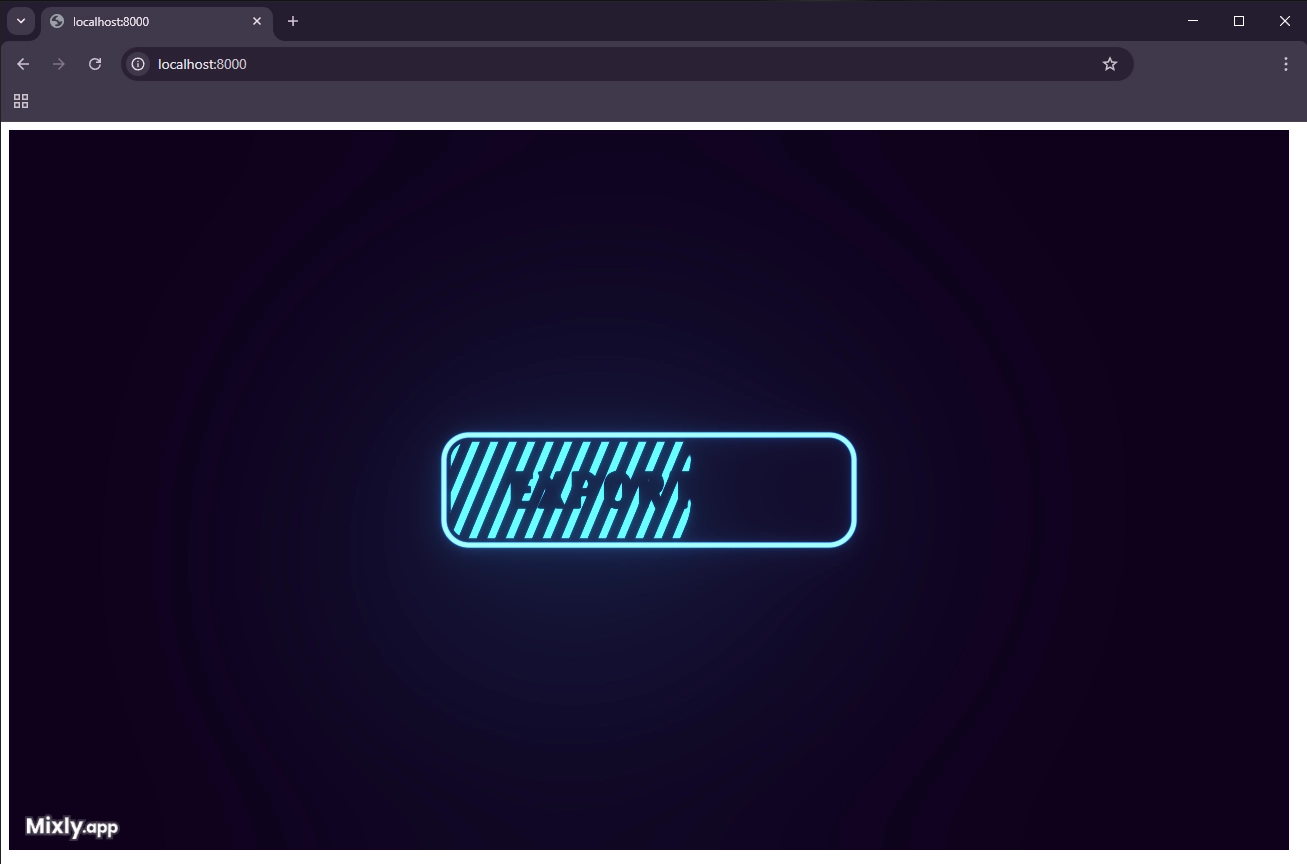
In this case the project was accessible on localhost:8000/.
Anatomy of an Exported Mixly Project
Now let's go over what's included in an exported project and how to customize it if needed.
Each Mixly project contains the following files and folders:
- index.html: Sets up the canvas element and initializes the
mixly-demo.jsscript. - mixly-demo.js: An example setup for initializing and playing the project.
- scene.js: Describes each Mixly element and animation.
- url-config.js: Defines resources used by the project. Edit this if you want to host resources elsewhere.
- /runtime: Contains the optimized runtime for the project.
- /images: Contains image resources used by the project.
The most relevant files to look into are index.html, mixly-demo.js, and url-config.js. We'll explore these in detail.
index.html
<!DOCTYPE html>
<html>
<body>
    <canvas id="canvas" class="canvas" width="1280px" height="900px"></canvas>
    <script type="module" src="mixly-demo.js"></script>
</body>
</html>
This is a minimal canvas setup. The HTML file contains a canvas element where Mixly renders the project. The script tag loads the project's JavaScript file.
mixly-demo.js
import { CreateWebGLPlayer, DefaultResourceLoader } from "./runtime/mixly-lib.es.js" //Player
import { sceneJson } from "./scene.js"; //Scene description json
import { urlConfig } from "./url-config.js"; //File resource configuration

const onPlayerLoad = () => {
    player.play();
}

let canvas = document.getElementById('canvas');
let player = CreateWebGLPlayer(new DefaultResourceLoader(urlConfig), canvas, sceneJson, onPlayerLoad);
Let's go over the demo code line by line.
let canvas = document.getElementById('canvas');The script first locates the canvas element set up in our HTML. The demo uses the element's `id` to locate the correct canvas. Alternatively, the canvas can also be created programmatically from code if preferred.
let player = CreateWebGLPlayer(new DefaultResourceLoader(urlConfig), canvas, sceneJson, onPlayerLoad);Here, the Mixly player is created and initialized. This will return null if initialization fails. Usually this means that WebGL is not available (often crawlers and bots).
DefaultResourceLoader: This is required from Mixly imports. The ResourceLoader handles fetching files, fonts, and other resources needed by the player.
canvas: This is the HTML canvas element where the player will render to. It was defined in `index.html`.
sceneJson: This is the project description that gets loaded into the player.
onPlayerLoad: This is a callback function triggered when the player is fully ready to present. Before it is invoked, calling any player functions (e.g., `play()`, `seek()`, `stop()`), or assigning variables is unsafe and will fail.
Currently (January 2025), only DefaultResourcePlayer is available. However, alternative resource loader types may become available in the future for more advanced loading patterns.
const onPlayerLoad = () => {
    player.play();
}
This callback, provided during player initialization, ensures it is safe to call methods like `play()`, `pause()`, or assign variables.
For example, assigning a variable like this is now allowed:
const onPlayerLoad = () => {
    player.play();
    player.setColorVariable("MyVariable", 0.0, 1.0, 0.0, 1.0);
}
This code sets the "MyVariable," which is a 4-component color, to green. This is equivalent to CSS's `rgba(0, 255, 0, 1.0)` since Mixly colors range from 0.0 to 1.0 (or higher for HDR).
Note!
At present, there is no official API for the Mixly player. While custom logic with variables is possible, the codebase may change in the future. A stable scripting API is not yet available.
The following player functions are relatively safe as of January 2025:
play()stop()seek(frame: number, render: boolean = true)onRender(myCallbackFunction)onUpdateLogic(myCallbackFunction)setFloatVariable(variableName: string, value: number)setVector2Variable(variableName: string, x: number, y: number)setVector3Variable(variableName: string, x: number, y: number, z: number)setColorVariable(variableName: string, r: number, g: number, b: number, a: number)getVariables()printVariables()
url-config.js
export const urlConfig = JSON.parse(`{
    "textures": {
        "mixly_sneaker-bg.png": "./images/mixly_sneaker-bg.png",
        "pexels-luis-quintero-2471235.jpg": "./images/pexels-luis-quintero-2471235.jpg",
        "mixly_79693_frosted_glass_window.webp": "./images/mixly_79693_frosted_glass_window.webp",
        "CircleFeatheredDonut.png": "./images/CircleFeatheredDonut.png",
        "white_radial_gradient.svg": "./images/white_radial_gradient.svg"
    },
    "fonts": {
        "Roboto Condensed": {
            "800": "https://fonts.gstatic.com/s/robotocondensed/v27/ieVo2ZhZI2eCN5jzbjEETS9weq8-_d6T_POl0fRJeyUypfBJ731BKMSK.ttf"
        }
    }
}`);
The resource loader fetches files defined in this configuration. You can modify the paths, for example, to host them externally or reorganize the folder structure.
As shown, `urlConfig` parses a text string. For greater control over resource setup, you can construct a matching JavaScript object directly.